Assembling the Leader Evaporator Half Pint - Part 1 of 4
Assembly of the structure of the evaporator
This year our plan is to put 100 taps in 100 trees. By Leader Evaporator's account, in their on-line catalog, processing the sap that is produced by those 100 taps may be a bit of a stretch with the Half Pint. My supplier assures me that they have at least one customer managing 100 taps with the Half Pint, and with the Flat Pan at that, while we chose the newly introduced Supreme Pan for increased capacity and efficiency. We shall see.
On a good day, of which we have had several in each of the past two seasons, we will collect two gallons from at least some of our taps. If we assume half of the 100 taps flow 2 gallons on that hypothetical high-flow day, and the other half flow 1 gallon, we would need to process 150 gallons of sap, preferably on that same day. The Leader sales rep told me that they assume a 9 hour day for evaporation, so worst case we might have to work a very long day to make syrup of the entire 150 gallons, or perhaps we would extend evaporation into the next day.
I picked up the Half Pint on 14 January; it fit nicely, if with very little room to spare, on a pallet in the back of a Honda Pilot. Sugar Bush Supplies Co. had it palletized and ready to go, and after measuring twice, they loaded it into the Pilot using a fork truck.
The story of its assembly and the "first boil" will be split into four parts:
Part 1 being assembly of the structure of the evaporator; the bottom, sides, back, front, legs, corner brackets, grate rails, and grate.
Part 2 will include assembly of the boiling and reservoir pans, and installation of the fire brick.
Part 3 will be the installation and leveling of the evaporator in the "sugar house."
And finally, Part 4 will document the first boil. I anticipate that the installation of the fire brick will be the most challenging for me; bolting stuff together I can do, masonry of any sort is not something I have done a lot of. Also, the refractory cement is supposed to dry at "room temperature" (65 F), which may prove challenging in our unheated garage. Of course that is part of the allure of this adventure, a life of learning something new every day.
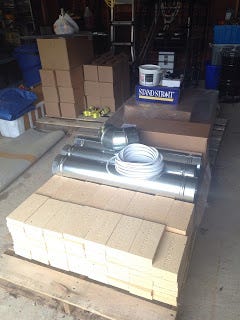
Starting with what was on that pallet that I picked up, the first things you might notice in the picture are the fire brick, and just behind the brick are three 3 foot sections of 6 inch diameter stove pipe, and a 90 degree elbow. The roll of white material resting on the stove pipe is actually a part of the sugar house, not the evaporator. Beyond the stove pipe you see some cardboard boxes (Half Pint Arch Parts List):
Cardboard Box A contained the heavy iron and hardware, including the legs for the evaporator, the grate rails, the grate, and the nuts and bolts. The nuts and bolts are all 1/4"(diameter) x 20 (threads per inch), which is nice, however three-quarter inch and half inch length screws are all packaged in the same Ziploc bag. This has the potential of leading to a mix-up during assembly. Been there done that of course, and it invariably leads to the need for significant disassembly and reassembly! I sorted the 1/2" from the 3/4" before starting work. Box A also contained the corner brackets and the Instruction Manual (link), which is commendably comprehensive and well-illustrated.
Cardboard Box B contained the sheet metal; front, back, bottom and sides, the so-called "draft latch," and the draft latch nut and bolt.
Two other boxes contained the "boiling pan" and the "reservoir pan," and the box that has "Standstrait" printed on it contained the draw-off valves and thermometers for the boiling pan, plus the "rail gasket," which goes between the arch and the boiling pan. The white plastic pail contains the refractory cement, for attaching the fire bricks to the inside of the arch and to each other. All parts arrived in good condition.
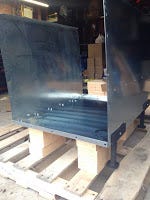
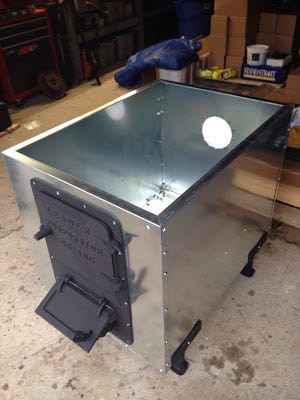
Step 1 of assembly loosely attached the left and right sides of the arch (think of the arch as the fire box) to the bottom.
Step 2 of assembly called for raising the arch up approximately 8 inches from the working surface; I used four stacks of three full firebricks to serve this purpose. Four 8 inch tall concrete blocks would also suffice. The fire brick was at hand, because it is required for evaporator assembly.
Steps 3-4 mount the legs.
Steps 5 and 6 mount the front and back panels.
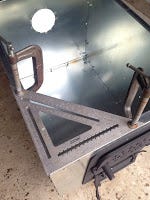
Step 8 squares up the assembly and tightens bolts in the corners (the instructions called for a carpenter's square, a speed square worked just as well)
Step 9 ensures all remaining bolts are tightened
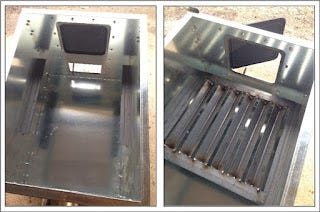
Step 10 is installation of the grate rail
Step 13 installs the grate assembly.
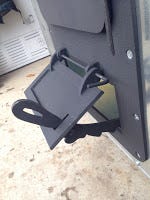
Step 12 was to install the draft door latch, which will be used to control air flow to the fire box
I allowed 4 hours for the assembly; that included some garage clean-up before starting work, and it included the time necessary to make the photographs and document any process issues that arose. And, in there somewhere was a break for some homemade pumpkin soup courtesy of Geri. I estimate the process of assembly took 2 of the 4 hours.
A safety note: Cut edges of sheet metal can be sharp; I just urge caution, avoid cutting yourself. There are also some knuckle-banging opportunities when tightening the nuts.
To this point the work has been straightforward. The holes in the sheet metal panels were well positioned to pull the panels into good alignment; I did not have to do any work to get the fasteners to fit through the holes. Tools required included a 7/16 inch socket / wrench, a Phillips-head screwdriver, three C-clamps, and a speed square or carpenter's square. Safety equipment included a pair of leather gloves to prevent the cuts and knuckle-banging previously mentioned.
-- John, 09 February 2016
Earn rewards by referring friends!


