Primal Woods: Sugar House Roof DIY
Two steam stacks, and one furnace exhaust stack; making and preparing the roof penetrations for the stacks
Bringing the Sugar House Conversion to Completion
There is one big project left for Primal Woods Sugarers, and a myriad of smaller details, in the completion of the Primal Woods Sugar House conversion; that being the roof penetrations required to allow for exit of steam from the Leader Evaporator Revolution syrup and flue pans, and smoke from the Inferno arch. The "arch" is basically the wood-fired furnace that heats the flue and syrup pans to make our Primal Woods Pure Michigan Maple Syrup. Let it be said, I'm no carpenter, and I'm no roofer. But again I think I am going to be pressed into service, this time as a roofer. Read on to see what this project involves.
I thought about naming this post, "A Day in the Life..." or words to that effect, because I am learning a lot for the first time, and therefore I engage in this sort of learning exercise frequently. And as I think about whether or not to do it myself, I am thinking also about how often I might in the future utilize a particular skill that will be developed in the doing. In this case, not only is time in short supply, in terms of the calendar and the imminent maple syrup season, but I need to make three roof penetrations in the house for bathroom vents. Construction skills in general are very valuable. So, I decided it was worth my while to take on this project. Still, I'll take some help if it shows up!
Mapping the Sugar House Roof Penetrations
The first step in this process is to locate the roof penetrations on the underside of the roof deck. This work is done from inside the Sugar House, and is done by dropping a plumb bob from the roof deck to the center of each of the three stack centers.
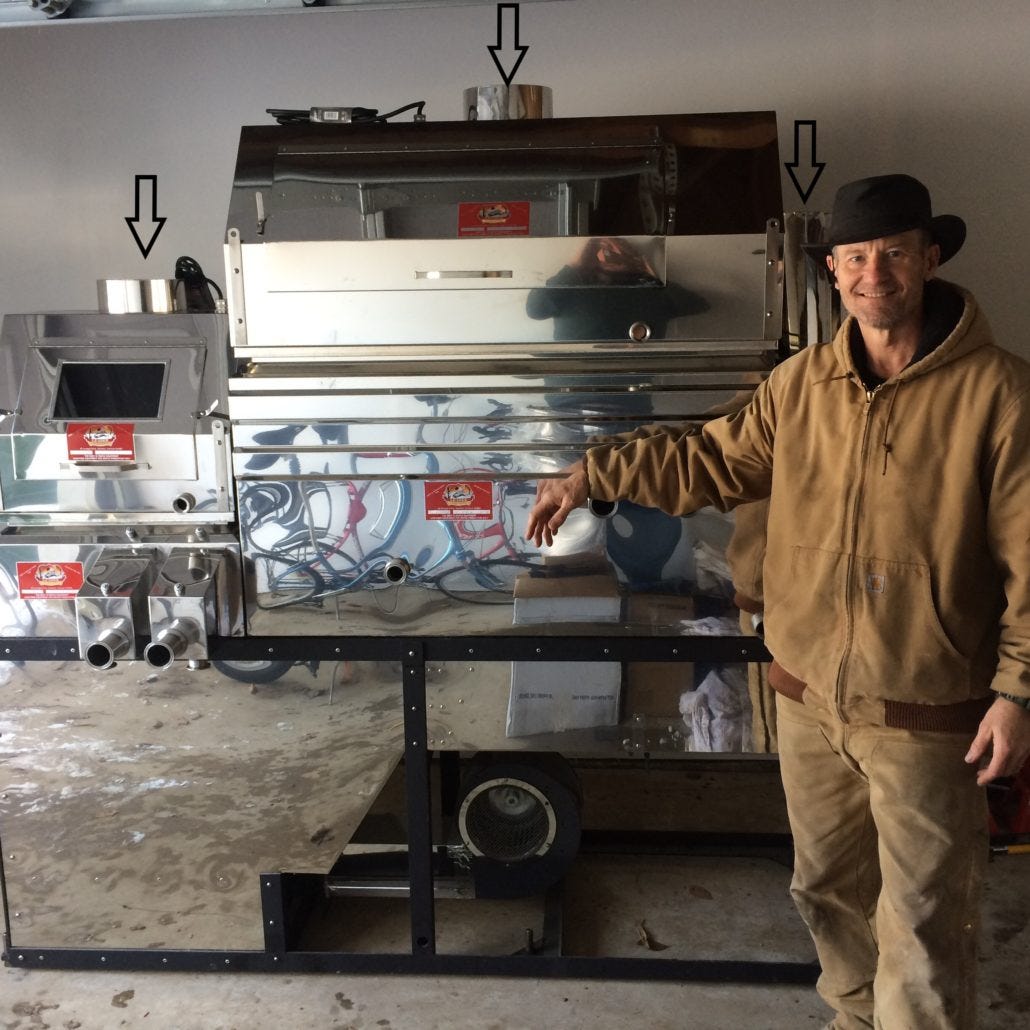
Stack locations (L-R), syrup pan steam, flue (evaporation) pan steam, arch (furnace) smoke. Ignore the bloke to the right, just somebody who happened by.
This work has been done, an extra set of hands was useful. Okay, that's it for the easy stuff.
Making the Sugar House Roof Penetrations and Installing the Roof Jacks
Now for the "heavy lifting." At least for me, where as mentioned I am taking this on for the first time, I try to do at least a modicum of research. These days research includes some Googling, and a quite often a trip to YouTube University. Below is the documentation I created as a result of that research. But first, what the heck is a "Roof Jack?"
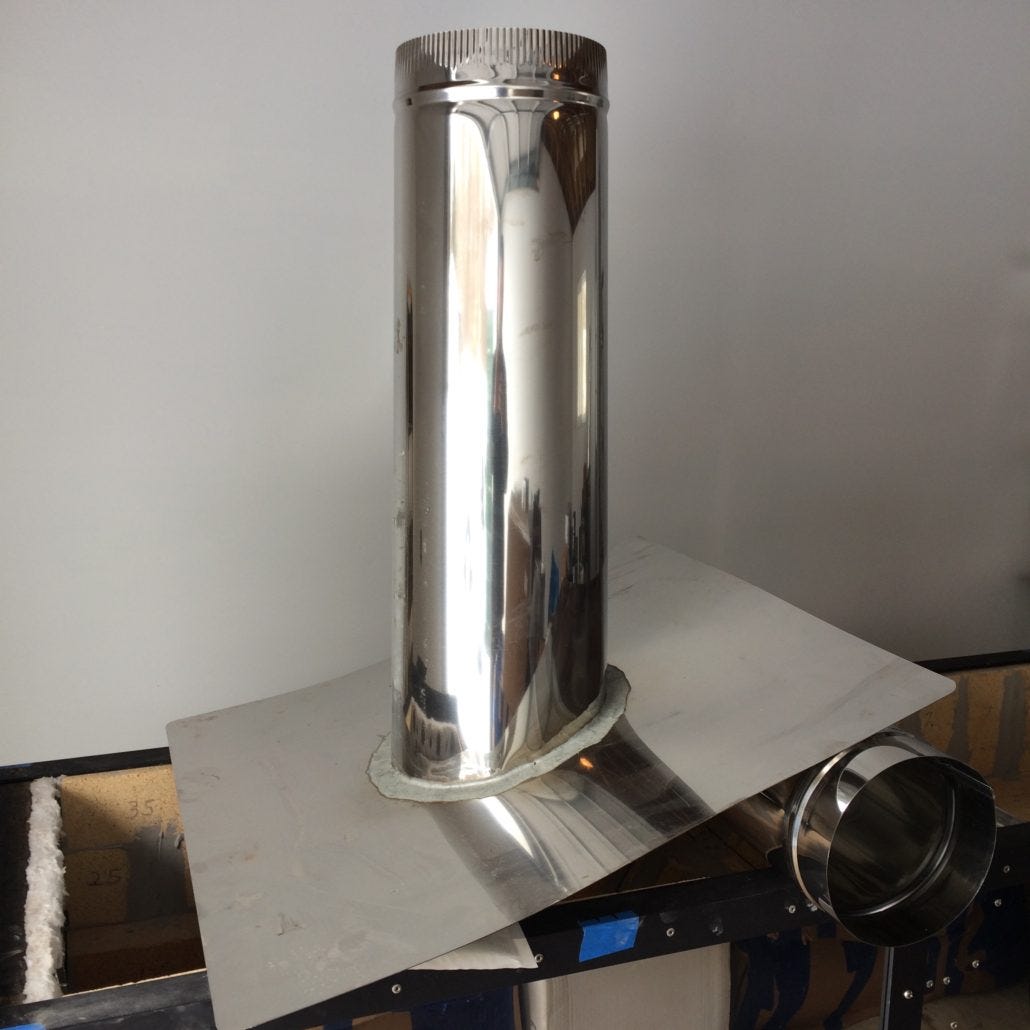
Leader Evaporator stainless steel "Roof Jack"
The Roof Jack is basically flashing, that's the flat piece, with a 3 foot section of stack attached. The flashing is 30 inches on each side, so it's quite a bit bigger than most plumbing or furnace vents in the average house. I've propped it up on one end so that the stack is more or less vertical, which is how it will sit on the roof. This Roof Jack was custom made for a 4 12 pitch roof. That pitch means that the roof rises 4 inches for every 12 inches of horizontal run. The steam and exhaust stacks from the evaporator and arch will fit inside their respective Roof Jacks, forming a double-wall. So, I need to install three of these on the roof. Now, on to the results of the "basic research." Or as Wernher Von Braun famously said, "Basic research is what I am doing when I don't know what I am doing." That's it baby! Keep in mind please, that these are what I call "notes to self." Anybody with more knowledge on the subject than I have, which is pretty much everybody, is welcome to chime in.
Steps in Making the Sugar House Roof Penetrations
Locate roof penetration centers on roof deck (from inside the Sugar House)
Drive screw up through roof deck to mark hole center(s) on the roof
Scribe hole outline on roof
Remove circular patch of shingle along hole outline using carpet knife
Cut hole through roof deck with drill and Sawzall
Steps in Installing the Sugar House Roof Jacks
Remove course(s) of shingles above hole as necessary to allow placement of Roof Jack (flashing is 30" square)
Place and secure Roof Jack flashing (2 or 3 nails or screws at the top edge) on roof underlayment (tar paper) above hole, and on top of existing shingles below hole). May need to trim flashing for smoke stack Roof Jack flashing near Hip Rafter. Sharp sheet metal shears (tin snips) might do the trick.
Replace old shingles, or install new if necessary. Use roofing cement (aka roofing tar) between Roof Jack flashing and layer(s) of shingles on top of the flashing, so that water does not flow sideways on top of flashing and underneath shingles.
Cover any exposed nails with roofing tar (aka roofing cement)
Caulk (see video 4, Dap Clear caulk recommended) new nails in old shingles above new shingles as necessary
Note: "up" or "above" would be in the direction of increasing vertical height of the roof trusses Note: the "sides" would be in a direction perpendicular to the roof trusses Note: second video below, in the comments section, a commenter says the underlayment (tar paper) should go over the Roof Jack, not under (I'm not seeing that in any of the videos) Note: In video 3, installer did not use roof tar between vent and tar paper, only between vent and shingles
Sugar House Roof Penetration YouTube Sources (all links open in new tab, I'm grateful for these YouTube Creators)
How To Install a Vent in Shingles (the best overall video)
How to install a pipe boot on your roof (good treatment of how-to with existing shingles)
I'm also grateful to Rick and Mary at Sugar Bush Supplies for the much appreciated hand-holding.
Tools and Supplies:
Milwaukee 18V portable drill with 1" paddle bit (drill hole for starting Sawzall cut)
Milwaukee Sawzall
Hammer
Tin snips (or jig saw with hacksaw blade)
Caulking gun
Framing square
Carpet knife/box knife
3/4" board as working surface
Shingles
Roofing nails
Roofing cement (in tube for caulking gun)
I plan to make another post of the work, including pictures, and possibly video, so stay tuned by subscribing!
All the best, and kind regards,
John


